Getting Started
Close any open ArcPro windows open from the previous step. We’ll open a new instance of ArcPro and start fresh for this part.
Table of contents
Setting up a Project
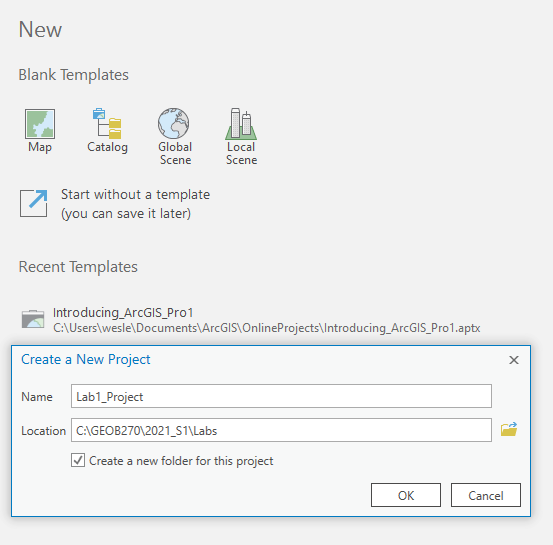
When ArcPro opens choose the Map under Blank Templates as shown below then create your new project. I’ve named mine Lab1_Project so I can easily identify it. This will be the name of the folder your project is saved in. Set the location to an appropriate workspace.
- I am working on my own computer, and my workspace workspace is “C:\GEOG270\2021_S1\Labs”. This is the location where the project folder will be reside. If you are working on a lab computer, you should put your project in C:\temp.
- It is very important to familiarize yourself with the procedures for saving your work if you are working on a lab computer.
- If you are unfamiliar with the Windows operating system (OS), it might be helpful to take a few moments to learn about the differences between Windows and the OS (Mac, Linux) you are used to working with. Once you set up a new project, close ArcGIS Pro for now.
Geodatabases
By default, ArcPro creates a geodatabase with every new project. You will see one called Lab1_Project.gdb in your project folder.
Geodatabase: A file management structure that is unique to ESRI products. You don’t have to store your data in a geodatabase (.gdb), but they have some enhanced functionality that makes them better than regular folders in some circumstances. One helpful thing we can do in a .gdb, is create a feature dataset to store our census data.
Feature Dataset: A collections of feature classes that are all in the same coordinate system. When you add a data to a feature dataset, it will automatically be projected into the coordinate system we specify. This can help us avoid making mistakes like working with data that is in the wrong coordinate system!
- We’ll cover this point more in depth later on in term.
Feature Class: A vector data layer stored in a geodatabase. Its a special file type created by ESRI to store data effectively within ArcGIS Pro. When vector data layers are not stored in a geodatabase, they are stored in other formats, such as shapefiles or geojsons.
- We’ll cover this point more in depth later on in term.
Download Data
Lets download the data we need and put it in the Lab1_Project folder you just created. Click the download button below. If a pop up appears, choose save, the file will be saved in the downloads folder.
Extract the Data
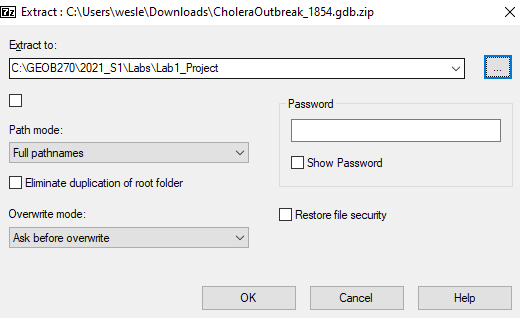
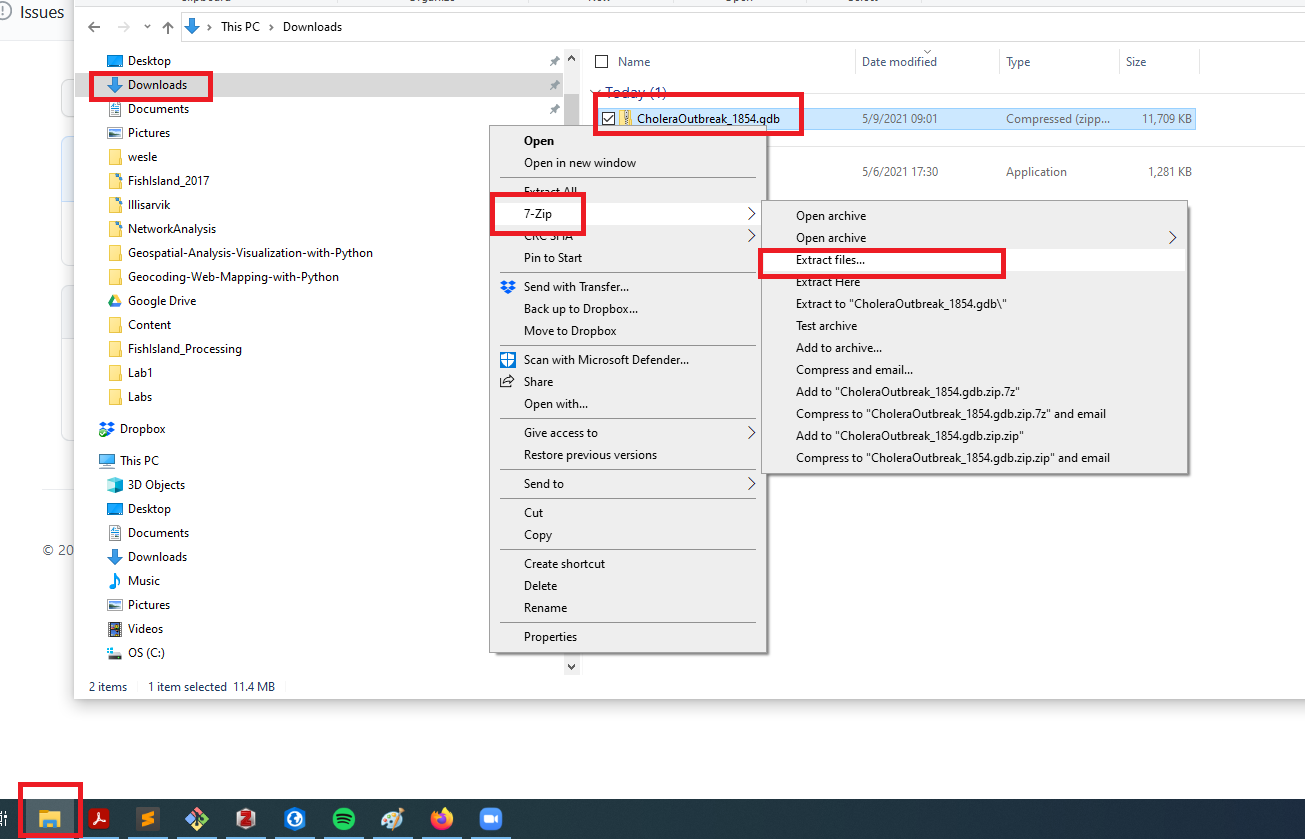
Open the windows file explorer (folder on bottom ribbon or search the start menu). Navigate to the downloads folder. You will see a folder called “CholeraOutbreak_1854.gdb”, note the type “Compressed (zipped) Folder” and size 11709 KB. Right click on the CholeraOutbreak_1854.gdb, choose a zip file manager, and select “Extract files”.
- Zip files (.zip) are a method for compressing data so it can be stored and transfered more efficiently. However, to work with the data, we have to extract it.
- On my computer, the 7-Zip is the .zip file manager. If you are working on the geography department computers, you can uses PeaZip instead. The specific options might differ, but the general principal is the same.
Save it to your Project Folder!
In the pop up window, set your Lab1_Project folder as the Extract to location.
- The lab data is now downloaded and stored in your project folder.